Posted on Leave a comment

Aesthetic Discord Server Template: Transform Your Dead Community

I remember staring at my glowing monitor at 2:00 AM, my heart sinking as I watched the little notification pop up in the bottom left corner: Another member has left the server.

Aesthetic Discord Server Template: Transform Your Dead Community

I was exhausted from trying to build an engaging online space that just ended up feeling like a ghost town. The turning point for me—and the fast solution to stopping this endless cycle of dead chats—was discovering the power of an Aesthetic Discord Server Template. By transforming my chaotic, overwhelming channels into a clean, visually cohesive, and cozy setup, I finally gave people a reason to stay, connect, and call my server home.

The turning point for me—and the fast solution to stopping this endless cycle of dead chats—was applying a done-for-you Aesthetic Discord Server Template. By transforming my chaotic, overwhelming channels into a clean, visually cohesive, and cozy setup, I finally gave people a reason to stay, connect, and call my server home.”

The breakthrough came when a friend finally gave me some tough love. They screen-shared my server and said, “Look at this. You have forty different channels. Everything is in all-caps. There are no welcome instructions. It feels like walking into a noisy, chaotic warehouse.”

They were right. My server wasn’t a cozy coffee shop; it was an overwhelming labyrinth. That is the moment I discovered the power of community design. I wiped the slate clean and created what I now call the ultimate Aesthetic Discord Server Template.

If you are struggling to keep your community alive, here is the fast answer to your problem: An Aesthetic Discord Server Template is a pre-designed, visually cohesive layout that uses specific symbols, lowercase fonts, pastel color hex codes, and clean category structures to instantly transform a chaotic chat into a cozy, welcoming home. By applying a clean template, you reduce digital clutter, making your members feel instantly relaxed and eager to engage.

This is the story of how I learned to stop building digital warehouses and started building digital living rooms—and how you can do the exact same thing right now.

Life Before an Aesthetic Discord Server Template: My Costly Mistake

Before we talk about making things beautiful, we have to talk about why so many communities fail before they even begin. When I first started building servers, I suffered from what I call “Feature Greed.” I thought more was better.

I had a channel for everything: #general, #memes, #gaming, #music-recs, #pet-pictures, #food, #bot-commands, and on and on. I also didn’t pay attention to visual hierarchy. The roles were a rainbow of clashing, neon colors. The channel names were aggressive and blocky.

Here is what happens psychologically when a new person joins a server like that:

  • Decision Fatigue: They are immediately hit with a wall of 30+ channels. They don’t know where to click first.
  • Intimidation: Loud, capitalized channel names feel corporate or aggressive.
  • Disconnection: Without a cohesive theme, the server lacks a “soul” or an identity. It just looks like every other generic gaming server on the internet.

I realized that digital spaces are just like physical spaces. Imagine walking into a café. If the music is blaring, the tables are a mess, and there are thirty different menus glued to the wall, you are going to turn around and walk right out. But if you walk into a café with soft lighting, pastel walls, a simple menu, and a cozy armchair… you sit down. You stay.

That is the exact feeling an aesthetic Discord server template creates.

What Makes a Discord Server “Aesthetic”?

The word “aesthetic” gets thrown around a lot on the internet, but in the context of community building, it means something very specific. It means intentional visual harmony.

When I set out to rebuild my community, I spent days studying the most active, engaged servers on the platform. I realized they all shared a few core principles. They weren’t just “cute”; they were engineered for comfort.

Here is what I discovered are the pillars of an aesthetic layout:

1. The Power of Lowercase and Spacing

Standard Discord channels use dashes (e.g., #general-chat). Aesthetic servers use special characters, dividers, and mostly lowercase letters to create a softer, more approachable look (e.g., ╭・☕・main-chat). Lowercase feels like a whisper; all-caps feels like a shout.

2. Thematic Emotes and Symbols

Instead of relying solely on standard emojis, aesthetic servers use a curated set of symbols (like kaomoji, stars, clouds, or bows) to categorize sections. This creates a subtle visual language. If a user sees a little pastel pink bow next to a channel, they instantly know it matches the server’s soft, cozy vibe.

3. Deliberate White Space

In web design, “white space” is the empty space around elements that gives the eyes room to rest. In Discord, you create white space by using “spacer” roles or empty, read-only channels acting as visual dividers between heavy text areas.

4. Cohesive Color Palettes

Instead of letting members pick from glaring neon reds and greens, an aesthetic server offers a curated color palette—often pastel, earth tones, or dark academia colors—using specific hex codes for server roles.

How to Create an Aesthetic Discord Server Template (The Blueprint)

After my initial failure, I decided to build a template from the ground up. I wanted a pastel, cozy, and clean community setup. This wasn’t just about making it look pretty; it was about guiding the user journey from the moment they joined.

Here are the exact steps I took, which you can follow to build your own template.

Step 1: Defining Your Community’s Vibe

You cannot build an aesthetic server until you know what “aesthetic” you are aiming for. I chose a Pastel & Cozy Cafe vibe because I wanted people to feel relaxed.

Take out a piece of paper and write down three words that describe how you want people to feel on your server.

  • Do you want them to feel nostalgic? (Y2K Aesthetic)
  • Do you want them to feel studious? (Dark Academia Aesthetic)
  • Do you want them to feel soft and safe? (Pastel/Cottagecore Aesthetic)

Once you have your vibe, pick a color palette. For my pastel template, I used tools like Coolors to find exact hex codes: Soft Pink (#FFB6C1), Matcha Green (#C1E1C1), and Baby Blue (#AEC6CF). I applied these hex codes strictly to all my server roles.

Step 2: Designing the Channel Hierarchy (Less is More)

This was the hardest lesson for me to learn. Cut your channels in half. If you want a clean aesthetic, you cannot have a cluttered sidebar. I consolidated my server into three simple, beautifully named categories. I used unique text symbols (which you can easily find on sites like Messletters or by searching “aesthetic text symbols”) to frame the names.

Here is the exact layout I used for my successful template:

Category 1: ╭・Information

  • ┊ 📜・rules (Read-only, clean bullet points)
  • ┊ 📢・announcements (Updates from staff)
  • ╰ 🌸・roles (Where people pick their aesthetic color)

Category 2: ╭・Community

  • ┊ ☕・lounge (The main general chat)
  • ┊ 📸・media (For all pictures, pets, and art)
  • ╰ 🎧・voice-chat (A single, welcoming voice channel)

Category 3: ╭・Support

  • ┊ 🎫・tickets (For private help)
  • ╰ 🤖・bot-commands (Kept out of the main chat to reduce spam)

Notice the flow? The brackets (╭, ┊, ╰) create a literal visual “box” around the categories, making them look incredibly neat and organized. This small detail changed everything.

Step 3: Crafting the Perfect Welcome Screen

First impressions are everything. When someone joins your server, they shouldn’t just be dropped into a chaotic chat where bots are screaming “USER HAS JOINED!”

I created an aesthetic onboarding experience. I set up a dedicated #welcome channel that only bots and admins could post in. When a user joined, a bot (like Mimu or Carl-bot) would post a beautifully formatted embed message.

The message didn’t just say “Welcome.” It told a story.

“Welcome to the Lounge. ☕ Grab a cup of coffee, pick your pastel color in the roles channel, and introduce yourself. We are so happy you found your way here.”

It included a customized, pastel-themed banner image at the top. Suddenly, people weren’t just joining a server; they were entering a curated experience.

Step 4: Structuring Aesthetic Roles

In my old server, roles were just a way to give permissions. In my new aesthetic template, roles became a way for people to express their identity.

I divided my roles into visual tiers, using invisible characters to create spacing in the role list.

Level 1: The Ping Roles (Soft colors)

  • ୨୧・Announcements
  • ୨୧・Events

Level 2: The Color Roles (Where members choose their name color)

  • ☁️ Pastel Pink
  • ☁️ Mint Green
  • ☁️ Lavender

By formatting the roles with little symbols (୨୧ and ☁️), the sidebar on the right side of Discord suddenly looked like a beautifully organized list rather than a random assortment of names.

Real-Life Example: From Ghost Town to Cozy Cafe

Let me tell you about Sarah. Sarah joined my server right after I implemented the new Aesthetic Discord Server Template.

In my old server, a user like Sarah would have joined, been overwhelmed by the thirty different pings and uppercase channels, and left. But this time was different.

Sarah joined and was greeted by a soft pink welcome embed. She navigated to the ╭・Information category, easily found the rules, and went to the roles channel. She picked the “Lavender” role, turning her name a beautiful, soft purple.

Because there was only one main chat channel (☕・lounge), she didn’t have to guess where to say hello. She dropped a message: “Hi everyone, love the vibe of this place. It feels so calming.”

Within minutes, three other members—who were no longer distracted by twenty different dead channels—saw her message and replied. They started talking about their favorite teas and books.

I sat back and watched the screen. No one was leaving. People were staying. They were actually talking. The aesthetic wasn’t just a fresh coat of paint; it was the architecture of connection. By removing the visual friction, I allowed human connection to flow naturally. My server grew from a dead 15 members to a thriving, active community of over 2,000 people in just a few months.

Where Can I Find Good Aesthetic Discord Server Templates?

You might be reading this and thinking, “This sounds amazing, but I don’t have the time to copy and paste hundreds of little symbols and hex codes.”

I completely understand. That was the most tedious part of my journey. I spent hours hunting down the perfect invisible spaces and kaomoji.

Thankfully, Discord introduced a feature that allows server owners to generate a “Template Link.” This is a literal magic wand for community builders. A template link copies the exact channel structure, role hierarchy, and server settings of an existing server, allowing you to instantly paste it into a brand new server of your own.

You can find high-quality aesthetic templates through a few distinct avenues:

  • Discord Template Websites: There are dedicated directories (like DiscordTemplates.com) where creators upload their setups. You can filter by tags like “aesthetic,” “pastel,” “anime,” or “gaming.”
  • YouTube Tutorials: Many community builders showcase their server designs on YouTube and leave a free template link in the description box.
  • Pinterest and Tumblr: Believe it or not, these highly visual platforms are goldmines for Discord aesthetics. Searching “Discord server layout ideas” will yield hundreds of visual blueprints.

When you use a template, remember that it provides the skeleton. It is still up to you to provide the heart. You will still need to add your own welcome messages, invite your own bots, and bring your unique energy to the space.

How Do I Keep My Community Clean and Safe? (The Hidden Side of Aesthetics)

An aesthetic server isn’t just about looking good; it is about feeling good. And a community cannot feel good if it isn’t safe.

During my journey, I learned that your moderation style must match your visual aesthetic. If your server looks like a cozy pastel café, but your moderators are yelling at people in all-caps and handing out aggressive bans for minor infractions, the illusion shatters. The “vibe” is destroyed.

Here is how I integrated safety into my aesthetic template seamlessly:

1. Aesthetic Moderation Bots

I stopped using generic, robotic-looking bots and switched to bots that allow deep customization, like Mimu. Mimu allows you to create custom auto-responses and embeds that match your server’s colors. Instead of a harsh, red warning message, a user who breaks a minor rule receives a gentle, pastel-colored DM reminding them of the server’s etiquette.

2. The “Quarantine” Category

Sometimes, drama happens. Instead of letting arguments spill out into the beautifully curated ☕・lounge, I created a hidden category called Staff Only. Inside, there is a channel called ticket-transcripts. If a member has an issue, they open a private ticket. This keeps the public spaces clean, positive, and focused on community, while allowing staff to handle disputes privately and empathetically.

3. Clear, Kind Rules

Rules don’t have to read like a legal document. In my template, I rewrote the rules to sound like a friend guiding you through their home.

  • Instead of: “NO SPAMMING. VIOLATORS WILL BE BANNED.”
  • I wrote: “🌸 Please be mindful of others and avoid sending too many messages at once. Let’s keep the chat readable and relaxing for everyone!”

This simple shift in tone drastically reduced the number of rule violations. When you treat people with kindness and respect through your design and your words, they naturally want to protect that space.

5 Frequently Asked Questions (FAQs) About Aesthetic Discord Server Templates

As I began sharing my templates with other struggling community builders, I noticed the same questions coming up again and again. Here are the clear, actionable answers to the most common hurdles you might face.

1. How do I use a Discord server template link?

Using a template is incredibly simple. When you click on a valid Discord template link, Discord will automatically open your app or browser client. A prompt will appear asking you to name your new server and upload an icon. Once you click “Create,” Discord instantly generates a brand new server with all the channels, roles, and permissions of the template fully set up. Note that templates do not copy over bots, messages, or actual members—just the structural layout.

2. What are the best aesthetic fonts for Discord?

Discord’s default font cannot be changed within the app itself, but you can use Unicode text generators (often found by searching “aesthetic text generator” online) to change the font of your channel names and roles.

The most popular aesthetic styles include:

  • Typewriter / Monospace: 𝚝𝚑𝚒𝚜 𝚒𝚜 𝚊𝚎𝚜𝚝𝚑𝚎𝚝𝚒𝚌
  • Small Caps: ᴛʜɪs ɪs ᴀᴇsᴛʜᴇᴛɪᴄ
  • Cursive / Script: 𝒯𝒽𝒾𝓈 𝒾𝓈 𝒶𝑒𝓈𝓉𝒽𝑒𝓉𝒾𝒸

A word of caution: Do not overuse crazy fonts, as they can be difficult for screen readers to process, making your server less accessible to visually impaired members. Use them sparingly for category headers, and keep main channel names readable.

3. How do I make aesthetic Discord roles?

To make your roles look aesthetic, you need three things: a clean naming convention, a unified color palette, and visual dividers.

First, pick a color palette (like Pastels) and gather 5–6 hex codes. Go to your Server Settings > Roles, and apply these specific hex codes.

Next, use symbols to unify the names. For example, instead of naming a role “Gamer”, name it 🎮・Gamer or ๑ Gamer.

Finally, use empty roles (roles with no permissions and a transparent color) to create visual space between your Admin roles, your Color roles, and your Ping roles.

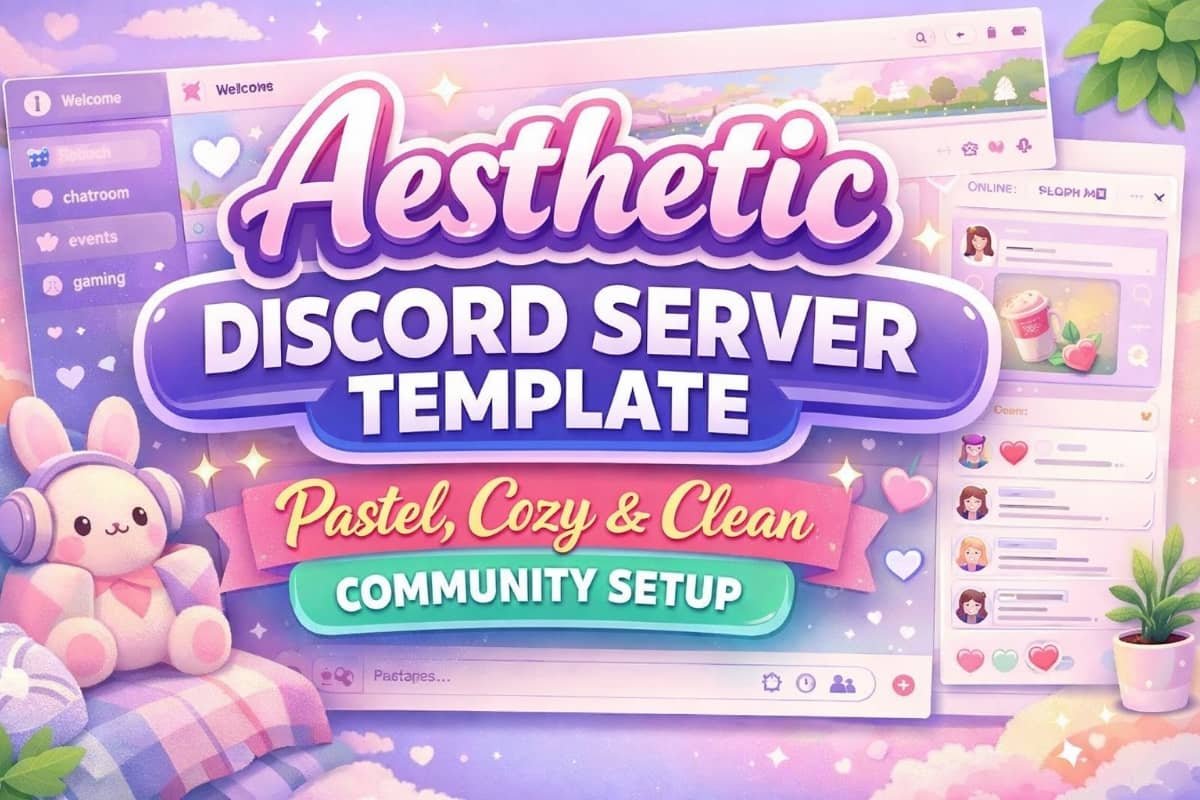
Aesthetic Discord Server Template | Pastel, Cozy & Clean Community Setup

Original price was: $9.99.Current price is: $7.99.

Create a cozy, pastel, and clean Discord community in one click.

This beginner-friendly Discord server template includes a fully organized layout, onboarding system, rules, roles, and staff channels—perfect for creators and community owners who want a beautiful server without the setup hassle.

✔ Pastel & cozy design
✔ Clean channel structure
✔ Ready-to-use roles & moderation
✔ Easy to customize
✔ Instant setup via Discord template

👇 Click “Get This Template” and get instant access and launch your Discord server in one click today.

Category:

4. What bots are best for an aesthetic server?

The best bots for an aesthetic server are the ones that allow you to customize their output using Webhooks and Embeds.

  • Mimu: Incredible for creating custom currency, shop menus, and beautiful pastel welcome messages.
  • Carl-bot or Dyno: Excellent for backend moderation and reaction roles. You can customize the embed colors to match your server’s hex codes.
  • Mudae or Karuta: Great for anime-themed or cozy gaming servers, keeping engagement high without cluttering the main chat.
  • Lofi Radio Bots: Adding a 24/7 lofi music bot to your voice channel instantly elevates the “cozy cafe” vibe.

5. Can I change my Discord server theme later?

Absolutely! One of the beautiful things about building a community is that it evolves. If you start with a Pastel Spring theme and want to switch to a spooky Dark Academia theme for Autumn, you can easily do so. You will simply need to go into your settings to update the role hex codes, swap out the emojis in your channel names (e.g., changing 🌸 to 🍂), and update your server banner and icon. Your members will actually love watching the server change with the seasons; it shows that the space is alive and actively cared for.

Aesthetic Discord Server Template – Pastel, Cozy, Clean & Beginner-Friendly

Create a beautiful, organized Discord server instantly using this aesthetic Discord server template. Designed for creators and community owners, this ready-to-use Discord template helps you launch a cozy Discord server without spending hours on setup.

Whether you’re building your first Discord starter server or upgrading an existing community, this pastel Discord layout gives you a clean and welcoming structure from day one.

🌸 What This Discord Template Includes

This Discord community template comes with a fully organized Discord layout, making your server easy to navigate and enjoyable for members.

✔ Information, community, activity, support, and staff categories
✔ Beginner-friendly onboarding with a start-here channel
✔ Pre-written rules for safe moderation
✔ A complete Discord roles template (Owner → Newbie)
✔ Private staff channels for moderation and management

Everything is structured for a smooth Discord setup, so you can focus on growing your community instead of configuring channels and permissions.

🧠 Perfect For

  • Creators & influencers
  • Cozy and aesthetic communities
  • Social & gaming servers
  • Anyone looking for a clean Discord server template

This template works perfectly as a Discord starter server and scales easily as your community grows.

🚀 How It Works

  1. Click Create Server
  2. Apply the Discord template
  3. Customize channel names, colors, and roles
  4. Invite members and go live

That’s it — your cozy Discord server is ready in minutes.

💖 Why Choose This Template?

✨ Soft pastel aesthetic design
✨ Clean and organized Discord layout
✨ Ready-to-use Discord roles template
✨ Fast and easy Discord setup
✨ Beginner-friendly and fully customizable

👇 Ready to launch your server?
Click Get This Template and get instant access to the full aesthetic Discord server template.

People Also Read: How to Save Money As a Teenager With No Job 

Conclusion: Building Your Digital Home

Looking back at that night when I was ready to delete my server and give up on community building, I am so grateful I didn’t. I am grateful I took a step back, looked at the digital mess I had created, and decided to learn the art of aesthetic design.

An Aesthetic Discord Server Template is so much more than cute fonts and pastel pink role colors. It is a philosophy of hospitality. It is about anticipating the needs of your members, removing anxiety and clutter from their screens, and providing them with a digital sanctuary where they can truly be themselves.

We spend so much of our lives online, scrolling through noisy, chaotic feeds. When you build a clean, beautiful, and thoughtful Discord server, you are giving people a rare gift: a quiet place to land. You are giving them a digital home.

If your server is currently struggling, if it feels messy, or if your members are quietly slipping away, don’t lose hope. You don’t need a marketing degree or a massive social media following to build a great community. You just need a little bit of empathy and a willingness to clean up your space.

Your next step is simple: Would you like to start designing your own community right now? Take a deep breath, define your vibe, grab a cozy cup of tea, and start building your beautiful new digital home today. Your future members are going to love it.

The AI Money Guide: How to Make Money With ChatGPT & Midjourney

Original price was: $6.99.Current price is: $2.99.

Stop grinding. Start building leverage with Generative AI.

​Discover how to make money with ChatGPT and Midjourney—ethically and without the hype. This guide helps you turn your existing skills into profitable digital products, passive income, and automated business systems.

​Perfect for beginners wanting to create a sustainable AI side hustle that works even when motivation fades.

Category:
Posted on Leave a comment

TikTok Hooks for Beginners: 50+ Scroll-Stopping Hooks You Can Copy

TikTok hooks for beginners saved my content journey when I was seconds away from quitting.

TikTok Hooks for Beginners

Here’s the fast answer upfront: the first 3 seconds of your TikTok matter more than everything else combined—and using the right hook can turn zero views into thousands, even if you’re brand new.

I didn’t know that when I started.

I remember staring at my phone, recording the same video six times, posting it anyway, and watching it die at 42 views. No comments. No likes. Just silence. I thought TikTok was rigged. Or worse—maybe I just wasn’t “cut out” for it.

But the truth was simpler and more hopeful: my hooks were terrible.

Once I learned how TikTok hooks actually work—and started using beginner-friendly hooks anyone can copy—everything shifted. Views climbed. Comments appeared. People watched past the first second.

This article is the guide I wish I had on day one.

You’ll get:

  • A story-driven breakdown of why hooks matter
  • A copy-paste list of 50+ TikTok hooks for beginners
  • Real examples, emotional lessons, and practical steps
  • Zero fluff. Zero “guru talk.” Just what works.

If you’ve ever felt invisible on TikTok, you’re in the right place.

Why TikTok Hooks for Beginners Matter More Than Anything Else

When I first joined TikTok, I believed good content would “speak for itself.” That belief cost me months of growth.

The painful realization

One night, I uploaded what I thought was my best video yet. Clean editing. Helpful tips. Clear voice. It flopped.

Scrolling later, I saw a shaky video—poor lighting, awkward delivery—pulling in hundreds of thousands of views.

The difference?

The hook.

TikTok doesn’t judge effort. It judges retention. If viewers don’t stop scrolling immediately, your video never gets a chance.

What I learned the hard way

A TikTok hook:

  • Stops the scroll
  • Sparks curiosity
  • Makes viewers think, “Wait… what?”

Talent helps. Consistency helps. But hooks decide whether your content is even seen.

TikTok has even confirmed in TikTok’s own creator insights that early watch time and viewer retention play a massive role in how far a video is pushed.

Takeaway: You don’t need confidence first. You need a hook first.

What Is a TikTok Hook (Explained for Absolute Beginners)

I used to think a hook was some clever marketing trick. It’s not.

A TikTok hook is simply the first line, visual, or moment that earns attention.

Hooks can be:

  • A sentence you say
  • Text on screen
  • A visual action
  • A bold claim
  • A question
  • A pattern interruption

Beginner mistake I made

I used to start videos like:

“Hey guys, today I’m going to show you…”

Those six words silently killed my reach.

TikTok hooks don’t introduce—they interrupt.

Even outside TikTok, marketing studies consistently show why strong hooks outperform production quality when it comes to audience retention.

Takeaway: If your hook feels polite, it’s probably weak.

The 3-Second Rule That Changed My TikTok Growth

TikTok gives your video a tiny test audience.

If people:

  • Watch past 3 seconds
  • Don’t swipe immediately
  • Show curiosity

Your video gets pushed further.

If they swipe? It’s over.

My breakthrough moment

I posted two videos with identical content.

  • Video A: “Here’s how to grow on TikTok”
  • Video B: “Nobody tells beginners this about TikTok…”

Video B got 12x more views.

Same tips. Same creator. Different hook.

This isn’t just a TikTok thing either — research on how quickly people decide what to pay attention to shows we make split-second judgments long before logic kicks in.

Takeaway: TikTok growth is less about what you say and more about how you start.

50+ TikTok Hooks for Beginners (Copy & Paste List)

These hooks are designed for:

  • New creators
  • Low confidence
  • Zero experience
  • Any niche

Use them exactly as written or tweak lightly.

Scroll-Stopping Question Hooks

  1. “Did you know this was possible on TikTok?”
  2. “Why is nobody talking about this?”
  3. “Are you making this beginner’s mistake?”
  4. “What would you do if this happened?”
  5. “Have you noticed this too?”

Curiosity-Based Hooks

  1. “This changed everything for me…”
  2. “I wish I knew this sooner”
  3. “This surprised me”
  4. “I didn’t expect this to work”
  5. “Something weird happened when I tried this”

Beginner-Friendly Relatable Hooks

  1. “If you’re new to TikTok, listen”
  2. “I struggled with this for months”
  3. “I almost quit TikTok because of this”
  4. “Nobody prepares you for this part”
  5. “I felt stupid until I learned this”

Bold Statement Hooks

  1. “Your TikTok videos aren’t bad—your hook is”
  2. “This is why your videos get no views”
  3. “Stop doing this on TikTok”
  4. “Most beginners get this wrong”
  5. “This matters more than hashtags”

Transformation Hooks

  1. “I went from zero views to this”
  2. “Here’s what changed my account”
  3. “This one tweak made a difference”
  4. “Before vs after learning this”
  5. “This is what finally worked”

Teaching Hooks

  1. “Here’s how beginners should do this”
  2. “Watch this before you post again”
  3. “Do this instead”
  4. “This is the easiest way to start”
  5. “Let me show you something simple”

Emotional & Story Hooks

  1. “This was embarrassing to admit”
  2. “I was scared to post this”
  3. “I didn’t want to believe this”
  4. “I learned this the hard way”
  5. “I wish someone told me this”

Visual + Text Hooks

  1. “Watch this carefully”
  2. “Pause and read this”
  3. “Don’t blink”
  4. “This took me too long to learn”
  5. “Save this if you’re a beginner”

Confidence-Building Hooks

  1. “You don’t need to be perfect”
  2. “You’re not bad at TikTok”
  3. “This is normal for beginners”
  4. “You’re not behind”
  5. “Anyone can do this”

Quick Pattern Interrupts

  1. “Stop scrolling”
  2. “Wait—this matters”
  3. “This might help you”
  4. “This is for beginners only”
  5. “Don’t make this mistake”

Bonus Hooks

  1. “This works even if you’re shy”
  2. “I tested this so you don’t have to”
  3. “This feels too simple—but it works”
  4. “I didn’t believe this at first”
  5. “This changed how I post forever”

How I Personally Use TikTok Hooks (My Simple Formula)

When I stopped overthinking and followed a repeatable structure, posting became easier—and less emotional.

My beginner-friendly hook formula:

Emotion + Curiosity + Promise

Example:

“I almost quit TikTok until I learned this…”

Then I deliver quickly.

No long intros. No backstory upfront.

Takeaway: Hooks are promises. Your content fulfills them.

How to Choose the Right Hook for Your Niche

You don’t need different hooks for every niche—just different angles.

Ask yourself:

  • Is my audience confused?
  • Frustrated?
  • Curious?
  • Afraid of failure?
  • Overwhelmed?

Match the hook to the emotion.

Example:

  • Education → curiosity hooks
  • Motivation → emotional hooks
  • Tutorials → teaching hooks

Takeaway: Speak to the feeling before the information.

Common Hook Mistakes Beginners Make (I Made All of These)

I want to save you time, frustration, and self-doubt.

Mistake #1: Talking too long before the point

Mistake #2: Explaining instead of intriguing

Mistake #3: Being polite instead of bold

Mistake #4: Assuming people care immediately

TikTok is earned attention—not given attention.

Takeaway: Hooks aren’t rude. They’re respectful of time.

How to Practice Hooks Without Burning Out

I used to feel pressure to be creative every day. That’s exhausting.

Here’s what worked:

  • Rotate 5–10 favorite hooks
  • Focus on clarity, not cleverness
  • Record hooks separately
  • Test without attachment

Your job isn’t to go viral. Your job is to show up consistently.

FAQs: TikTok Hooks for Beginners

1. What are TikTok hooks for beginners?

TikTok hooks for beginners are short, attention-grabbing openings that stop viewers from scrolling and encourage them to watch your video.

2. How long should a TikTok hook be?

Ideally 1–3 seconds. Short, clear, and emotionally engaging works best.

3. Can beginners copy hooks?

Yes—and they should. Copying proven hook structures helps you learn faster.

4. Do hooks work in every niche?

Absolutely. Hooks are universal because attention is universal.

5. What if my hook feels awkward?

That’s normal. Confidence comes after repetition, not before.

People Also Read: Easy Side Hustles for Teens With No Experience (A Real-Life Journey)

Conclusion: Your Voice Matters—Hooks Just Help It Be Heard

If you remember one thing, let it be this:

Your content isn’t invisible because it’s bad. It’s invisible because it never got a chance.

TikTok hooks for beginners aren’t manipulation. They’re invitations.

I went from quiet frustration to real momentum by learning how to start better—not by becoming someone else.

You don’t need confidence. You don’t need fancy editing. You don’t need luck.

You need a hook.

Pick one. Press record. And let yourself be seen.

Posted on Leave a comment

Scholarship Essay Examples About Obstacles That Won (Bad Grades)

Scholarship essay examples about obstacles saved my future—before my GPA ever could.

Scholarship Essay Examples About Obstacles

Scholarship essay examples about obstacles are the reason I won funding even when my grades said I shouldn’t. If you’re worried that academic setbacks, personal struggles, or a messy transcript have already disqualified you, here’s the truth: scholarships are often won by students who can explain why things went wrong—and what they learned because of it. 

This article is a collection of scholarship essay examples about obstacles—and the hard-earned lessons behind them—that actually won. I’m sharing how I wrote mine, what nearly cost me everything, and how you can turn your own obstacles into your strongest advantage.

Why Scholarship Essay Examples About Obstacles Matter More Than Perfect Grades

I didn’t learn this until I was almost too late.

I was staring at my transcript—numbers that felt like a verdict. Not terrible. Not great. Definitely not “scholarship material,” at least not by the standards I’d absorbed from guidance counselors and glossy brochures.

But here’s what scholarship committees quietly look for:

  • Resilience over perfection
  • Growth over polish
  • Context over comparison

Grades show performance. Obstacles show character.

This focus on resilience and personal growth is also reflected in how many programs evaluate applicants holistically, not just academically, as explained by the U.S. Department of Education’s guidance on college readiness and success.

The moment this clicked for me

A mentor once said, “Anyone can get good grades in perfect conditions. Show me who you are when life interferes.” That sentence changed how I approached everything—including my essays.

Application for you:
If your grades suffered, don’t hide it. Explain it. Then show what you did next.

What counts as an “obstacle” in scholarship essays? (More than you think)

When I first heard “write about obstacles,” I froze. I thought obstacles had to be dramatic—illness, loss, poverty.

But obstacles can be quiet, invisible, and still valid.

Real obstacles that won scholarships

  • Being the first in your family to attend university
  • Working long hours while studying
  • Language barriers as an international student
  • Mental health struggles
  • Family responsibilities
  • A single year that derailed everything

My obstacle (that I thought didn’t count)

Burnout.
I was juggling expectations I never agreed to, in a system that never explained the rules. My grades dipped—not because I didn’t care, but because I cared too much without support.

Application for you:
If your obstacle changed how you learned, who you became, or what you value—then it counts.

Scholarship essay example #1: “My grades dropped—but my responsibility rose”

This was the first essay that ever won me money.

The story

During my second year, my grades slipped hard. Not because I stopped trying—but because my family needed income. I worked nights. I studied in fragments. Sleep became optional.

I didn’t romanticize it. I didn’t beg for sympathy.

I wrote:

“My GPA reflects the year I became an adult before I was ready.”

Then I showed:

  • What I learned about time management
  • How I rebuilt my study habits
  • Why that experience prepared me for leadership

Why it worked

  • Honest explanation, not excuses
  • Clear ownership
  • Strong forward momentum

Application for you:
When explaining bad grades, use this formula: Context → Action → Growth

How to write obstacle-based essays that don’t sound like excuses

This is where most applicants lose scholarships.

They either:

  • Over-explain
  • Defend themselves
  • Blame others

What committees want instead

They want self-awareness.

This approach mirrors best practices used in reflective academic writing, where context and growth matter more than justification, as outlined by the Purdue Online Writing Lab’s advice on personal statements.

Here’s what I used:

The 3-part reflection method

  1. What happened (brief, factual)
  2. How it changed me (emotion + insight)
  3. What I do differently now (proof of growth)

Example sentence that works

“That semester taught me that effort without strategy leads to burnout—and burnout taught me how to ask for help.”

Application for you:
Never end a paragraph in the past. Always bring it forward.

Scholarship essay example #2: “I failed before I found my direction”

This one came from a friend—but I helped edit it, and it won.

The story

She failed two courses in her first year. Not because she wasn’t capable—but because she was pursuing a major her parents chose.

Her essay didn’t bash her family. It explored:

  • Pressure vs. purpose
  • The courage to pivot
  • What academic ownership looks like

Why it stood out

  • Emotional maturity
  • Respectful honesty
  • A clear turning point

Application for you:
Scholarships love clarity after confusion. If you changed direction, explain why it made you stronger—not weaker.

The biggest mistake students make with obstacle essays

I almost made it myself.

I tried to sound impressive.

Big words. Polished sentences. Zero heartbeat.

What fixed it

I rewrote my essay as if I were telling the story to one person who genuinely cared.

Shorter sentences. Real moments. Specific details.

Instead of:

“This adversity instilled resilience and perseverance.”

I wrote:

“There were nights I studied in my car because it was quieter than home.”

That line changed everything.

Application for you:
Specific beats are sophisticated. Always.

Scholarship essay example #3: “English was my second language—and my silent fear”

This example won a major international scholarship.

Language barriers and cultural adjustment are widely recognized challenges for international students, including by organizations like UNESCO’s education and student mobility research.

The story

The student described:

  • Sitting in lectures, understanding ideas but not words
  • Being mistaken for disengaged
  • Writing papers that took triple the time

But the essay focused on adaptation, not frustration.

The breakthrough moment

She wrote about the first presentation she volunteered for—despite fear.

Why it worked

  • Vulnerability
  • Initiative
  • Growth under pressure

Application for you:
If your obstacle made you uncomfortable—but you leaned in anyway—that’s gold.

How to structure scholarship essay examples about obstacles (the winning template)

This is the exact structure I still recommend:

1. Start in the middle of the struggle

Drop the reader into the moment.

2. Reveal the obstacle naturally

Don’t label it. Let it show.

3. Reflect with honesty

What did it cost you? What did it teach you?

4. Show present strength

Who are you now because of it?

5. End with direction

What are you moving toward?

Application for you:
If your essay reads like a journey—not a justification—you’re doing it right.

Can you really win scholarships with bad grades? Yes—and here’s why

Let me be clear: grades matter.

But they’re not the whole story.

Scholarships are investments. Committees ask:

“If we support this person, what kind of future are we supporting?”

Obstacles answered that question better than my GPA ever did.

What outweighed my grades

  • Consistency after failure
  • Clear goals
  • Emotional intelligence
  • Proof of learning

Application for you:
Don’t try to compete on numbers if your strength is narrative. Compete where you win.

Turning your obstacle into a message of impact

This was the final shift for me.

I stopped writing about my obstacle—and started writing through it.

Instead of:

“This experience was difficult.”

I wrote:

“This experience reshaped how I define success.”

Ask yourself:

  • What do I understand now that I didn’t before?
  • Who benefits from this understanding?
  • How will this shape my future choices?

Application for you:
Scholarships fund people who transform difficulty into direction.

People Also Read: How to Earn Money After School Without Leaving Home: My Real Journey From Broke to Confident

Frequently Asked Questions (FAQs)

1. Are scholarship essay examples about obstacles better than achievement essays?

Often, yes. Obstacle essays show depth, resilience, and growth—qualities that achievements alone don’t always reveal.

2. Should I mention bad grades directly in my scholarship essay?

If they’re relevant to your obstacle, yes. Briefly explain the context and focus on what changed afterward.

3. Can international students write obstacle-based scholarship essays?

Absolutely. Language barriers, cultural adjustment, financial pressure, and relocation are powerful obstacles when framed with growth.

4. How emotional should my scholarship essay be?

Emotional—but controlled. Show feeling, not drama. Reflection matters more than intensity.

5. What if my obstacle feels “too small”?

If it changes how you think, act, or grow—it’s not too small. Impact matters more than scale.

Final thoughts: your obstacle is not your weakness

I won scholarships not despite my obstacles—but because I finally understood them.

Your grades tell one story.
Your obstacles tell another.

When you write with honesty, clarity, and courage, you give committees something rare: trust.

If you’re staring at your transcript right now, wondering if it’s enough—this is your sign.Your story still counts.
And it might be exactly what they’re looking for.

Posted on Leave a comment

ChatGPT Prompts For Homework Help: Finish Faster (Without Cheating)

ChatGPT prompts for homework help completely changed the way I study, learn, and handle assignments under pressure. Instead of feeling stuck, overwhelmed, or tempted to copy answers, I discovered that the right prompts turn ChatGPT into a patient, step-by-step tutor that actually helps you understand your homework.

The breakthrough wasn’t the tool itself—it was learning how to ask smarter questions, ethically and effectively.

ChatGPT Prompts for Homework Help

This article is my story of struggling, adapting, and eventually mastering homework with the right ChatGPT prompts—written for students, parents, and lifelong learners who want clarity, confidence, and ethical success.

I didn’t start out confident. I started overwhelmed, tired, and close to giving up.

ChatGPT Prompts for Homework Help: The Night I Hit Academic Burnout

It was 1:47 a.m. My laptop battery was dying. I had three unfinished assignments, one confusing math problem, and a history essay that felt impossible to start. I stared at the screen, blinking back frustration.

I wasn’t lazy. I was trying—hard.
But traditional studying wasn’t working for me.

I had already:

  • Watched three YouTube explanations
  • Googled the same question in five different ways
  • Read my textbook twice without absorbing anything

That night, a friend casually said, “Why don’t you just use ChatGPT for homework help?”

I resisted at first. I thought that meant cheating.

I was wrong.

Is using ChatGPT for homework help cheating or smart learning?

This was my biggest fear—and probably yours too.

At first, I typed something lazy:

“Solve this problem for me.”

The answer came back perfectly formatted… and completely useless to me.

I didn’t understand it.

That’s when I realized something important:
ChatGPT doesn’t replace learning—it reflects how you ask.

When I changed my approach, everything shifted.

Instead of asking for answers, I asked for guidance.

What I learned the hard way

Cheating feels fast—but understanding feels powerful.

ChatGPT becomes ethical and effective when you:

  • Ask it to explain, not complete
  • Request step-by-step reasoning
  • Use it as a tutor, not a shortcut

That mindset change made all the difference.

That’s when I realized something important: ethical learning isn’t about avoiding tools—it’s about using them the right way.

How I accidentally discovered the power of better prompts

My breakthrough came during a math assignment I was failing badly.

Instead of asking for the solution, I typed:

“Explain this math problem like I’m 12 years old, step by step, and tell me why each step matters.”

The explanation clicked instantly.

I felt something I hadn’t felt in weeks: relief.

Then confidence.

Then momentum.

That single prompt taught me the real lesson:
The quality of your ChatGPT prompts for homework help determines the quality of your learning.

What makes ChatGPT prompts for homework help actually effective?

Effective prompts do three things:

  1. Set context – what you’re studying and your level
  2. Ask for explanation – not just results
  3. Invite interaction – examples, questions, and checks

Here’s the structure I started using consistently:

“I’m a [grade/level] student studying [subject]. Explain [topic] step by step using simple language and real-world examples. Then quiz me to make sure I understand.”

This turns ChatGPT into a private tutor—patient, judgment-free, and available anytime.

This mirrors how students actually learn when they slow down and focus on understanding instead of memorization.

ChatGPT prompts for math homework that finally made sense

Math was my weakest subject. Numbers felt cold and unforgiving.

The mistake I made early on was asking for answers instead of understanding.

The prompt that changed math for me

“Walk me through this math problem slowly, explaining why each step works. Show common mistakes students make and how to avoid them.”

Suddenly:

  • I understood formulas instead of memorizing them
  • I could redo similar problems on my own
  • My test anxiety dropped because I trusted my process

How you can apply this

When using ChatGPT for math:

  • Ask for concept explanations
  • Request multiple solution methods
  • Ask it to check your own work

That last one is huge.

Using ChatGPT prompts for writing essays without sounding robotic

Writing assignments used to paralyze me. I had ideas—but no structure.

ChatGPT helped, but only after I stopped asking it to write for me.

The ethical, effective writing prompt

“Help me brainstorm an outline for an essay about [topic]. Ask me questions to clarify my argument, then suggest ways to strengthen my thesis.”

This kept my voice intact while removing the fear of the blank page.

What I gained

  • Clear structure before writing
  • Stronger arguments
  • Better flow without plagiarism

Teachers noticed the improvement—and so did I.

That approach kept my voice intact while respecting academic integrity.

ChatGPT prompts for science and homework explanations

Science homework overwhelmed me with vocabulary and abstract concepts.

The fix wasn’t more reading—it was simpler explanations.

My go-to science prompt

“Explain this science concept using everyday examples and simple language. Then summarize it in 3 bullet points I can remember for a test.”

Science stopped feeling intimidating once it felt human.

I often paired ChatGPT explanations with free learning resources to reinforce what I’d just learned.

How I used ChatGPT prompts for homework help to study for exams

Studying used to mean rereading notes and hoping for the best.

Now it’s interactive.

Exam study prompt that works

“Pretend you’re my tutor. Ask me practice questions on [topic], increase difficulty gradually, and explain my mistakes kindly.”

This helped me:

  • Identify weak spots early
  • Practice actively instead of passively
  • Build confidence before exams

Learning became something I did, not something that happened to me.

Common mistakes students make with ChatGPT homework help

I made all of these—so you don’t have to.

Mistake 1: Asking vague questions

“Explain this” isn’t enough. Be specific.

Mistake 2: Copy-pasting answers

This kills learning and risks academic integrity.

Mistake 3: Not following up

The magic happens when you ask, “Why?” and “What if?”

ChatGPT rewards curiosity.

How parents and teachers can encourage ethical ChatGPT use

This tool isn’t the enemy.

Used correctly, ChatGPT:

  • Builds independent thinking
  • Supports struggling learners
  • Encourages curiosity instead of fear

The key is guidance, not restriction.

Teach students how to ask thoughtful questions—and learning follows.

The emotional shift I didn’t expect from using ChatGPT

Here’s what surprised me most:

I stopped feeling stupid.

I stopped comparing myself to others.

I started believing I could learn—just differently.

That confidence spilled into everything else.

FAQs: ChatGPT prompts for homework help

1. Can ChatGPT really help with homework without cheating?

Yes. When used for explanations, practice, and guidance—not direct answers—it supports ethical learning.

2. What are the best ChatGPT prompts for homework help?

Prompts that ask for step-by-step explanations, examples, and quizzes work best.

3. Is ChatGPT good for younger students?

Absolutely, with supervision. You can ask it to explain concepts at any grade level.

4. Can ChatGPT replace tutors?

It can’t replace human connection—but it can supplement learning affordably and accessibly.

5. How do I avoid sounding AI-generated in writing?

Use ChatGPT for structure and feedback, not final drafts. Always write in your own voice.

People Also Read: Student Proofreading Side Hustle for Beginners: How I Built Mine From Zero

Final thoughts: This isn’t about AI—it’s about believing you can learn

ChatGPT prompts for homework help didn’t make me smarter.

They made learning possible again.

If you’re struggling, overwhelmed, or doubting yourself—start small. Ask one better question tonight.

You don’t need to be perfect.

You just need to be curious.

And if my journey proves anything, it’s this:

When you learn how to ask, the answers finally make sense.

Posted on Leave a comment

How to Make Money Online as a Student Using Only a Phone: My Real Journey From Broke to Confident

How to make money online as a student using only a phone was the exact phrase I typed into Google at 2:17 a.m., sitting on my dorm bed, stomach tight with anxiety and my bank balance blinking $12.43.

How to Make Money Online as a Student Using Only a Phone: My Real Journey From Broke to Confident

Here’s the fast answer before we go any further: yes, it’s possible—and no, you don’t need special skills, startup money, or a laptop. You need a phone, consistency, and a realistic plan that actually works for students.

What follows isn’t a get-rich-quick fantasy. It’s my honest, sometimes messy, deeply human journey—how I went from broke, overwhelmed, and embarrassed to earning steady online income with nothing but a phone in my hand.

If you’re a student who feels stuck, this is for you.

How to Make Money Online as a Student Using Only a Phone: Is It Really Possible?

I didn’t start this journey because I was ambitious. I started because I was scared.

At that point, I wasn’t chasing hype—I just needed legitimate ways to earn money online that wouldn’t put my privacy or future at risk.

I was juggling classes, part-time shifts, and family expectations. Asking my parents for money felt like failure. Traditional jobs conflicted with my schedule. Freelancing “required a laptop,” according to everyone online.

All I had was:

  • A smartphone
  • Unreliable Wi-Fi
  • Long gaps between classes
  • A quiet desperation to figure something out

I remember scrolling social media, watching people my age talk about “side hustles,” while I calculated whether I could afford instant noodles or needed to skip dinner.

That pressure became my turning point.

Reflection:
I learned something crucial early on: constraints don’t kill progress—they shape it.

Application:
If you’re reading this with “only a phone,” stop seeing that as a limitation. It’s a tool—one millions are using to earn real income.

Can You Really Make Money Online as a Student With Just a Phone?

Short answer: Yes. Long answer: only if you avoid the lies.

I fell for a few of them early on:

  • “Earn $500 a day instantly”
  • “No effort required”
  • “Just copy and paste”

None of that worked.

What did work were boring-sounding methods that:

  • Paid slowly at first
  • Required consistency
  • Fit into small pockets of time

The truth: Your phone is powerful enough to earn money—but only when paired with realistic expectations.

Learning the online income basics helped me understand the difference between quick cash and sustainable earning models.

What changed everything for me was shifting from “How can I get rich?” to “How can I earn my first $10 online?”

That mindset shift removed pressure—and results followed.

How I Earned My First $10 Online Using Only My Phone

This moment mattered more than any paycheck later.

It wasn’t a lot. But when that first $10 hit my account, something cracked open inside me. Proof.

Here’s what I did:

  • I signed up for a simple microtask platform
  • Completed short writing and review tasks between classes
  • Cashed out after two days

Emotionally? I felt relief, pride, and control for the first time in months.

Reflection:
Money isn’t just currency—it’s confidence.

Application:
Your first goal shouldn’t be replacing your income. It should be proving to yourself that earning online is possible.

What Are the Best Ways to Make Money Online as a Student Using Only a Phone?

This is where most articles dump a list and disappear. I won’t do that.

Below are the methods I personally tested, including what worked, what didn’t, and who each option is actually for.

1. Freelancing From Your Phone (Yes, Really)

I assumed freelancing required advanced skills. It doesn’t.

I started with:

  • Writing short captions
  • Editing text
  • Simple research tasks

Apps and mobile-friendly platforms made it possible.

My mistake: trying to be perfect
My breakthrough: being reliable

Application:
If you can type, follow instructions, and communicate clearly—you can freelance.

2. Content Creation Without Showing Your Face

I was camera-shy. Still am.

So I leaned into:

  • Quote pages
  • Niche Instagram accounts
  • Short-form text-based videos

I posted consistently for 60 days. No viral hits. No overnight success.

Then one message came: “Can you promote our product?”

That was my first brand deal—earned entirely from my phone.

Reflection:
Visibility beats talent in the beginning.

3. Online Surveys and Microtasks (The Honest Truth)

Let’s be real: these won’t make you rich.

But they:

  • Require zero skills
  • Work well during downtime
  • Help with emergency expenses

I used these during exam weeks when mental energy was low.

Application:
Think of this as financial breathing room—not a long-term plan.

4. Selling Digital Products You Create on Your Phone

This surprised me most.

I created:

  • Simple PDFs
  • Study planners
  • Checklists based on my own student struggles

Used free apps. No design background.

One planner earned more in a week than my part-time job.

Reflection:
Your experience has value—even if you don’t see it yet.

5. Affiliate Marketing Through Social Media

This one took patience.

I shared:

  • Tools I genuinely used
  • Honest reviews
  • Small tutorials

No spam. No fake lifestyle.

After three months, commissions became consistent.

Application:
Trust converts better than hype.

How to Balance Studying and Making Money Online Without Burning Out

This nearly broke me.

At one point, I was:

  • Studying late
  • Working online constantly
  • Sleeping poorly

The money came—but joy disappeared.

I had to relearn balance.

What helped:

  • Time-blocking in 30-minute chunks
  • Choosing one income method at a time
  • Allowing rest without guilt

Reflection:
Burnout costs more than breaks.

Common Mistakes I Made (So You Don’t Have To)

I want to save you months.

Here’s what not to do:

  • Jump between methods weekly
  • Chase trends instead of skills
  • Compare your progress to influencers
  • Ignore small wins

Application:
Progress compounds when focus stays put.

I also learned—sometimes the hard way—to avoid online job scams, especially offers that promise instant money with zero effort.

What I’d Do If I Were Starting Again Today

If I were broke again—with only a phone—I would:

  1. Choose one method
  2. Commit for 90 days
  3. Track small wins
  4. Ignore noise
  5. Invest earnings back into skills

No shortcuts. No fantasies.

Just steady growth.

How Making Money Online Changed Me as a Student (Beyond Money)

The money helped—but that wasn’t the biggest change.

I gained:

  • Confidence in my abilities
  • Control over my time
  • Belief in my future

I stopped feeling behind.

Reflection:
Financial independence—even small—rewires your mindset.

People Also Ask: Honest Answers Students Need

Is it safe to make money online as a student?

Yes—if you avoid schemes asking for upfront fees and stick to reputable platforms.

How much can a student realistically earn using only a phone?

Anywhere from $50 to $1,000+ per month, depending on consistency and method.

Do I need to pay taxes on online income as a student?

In many countries, yes. Even small income may be taxable—check local rules.

Can I do this without social media?

Absolutely. Freelancing, surveys, and digital products don’t require followers.

How long does it take to see results?

Some methods pay within days; others take weeks. Consistency matters more than speed.

Final Thoughts: If You’re a Student Reading This at 2 a.m.

I see you.

The stress. The uncertainty. The quiet fear of falling behind.

How to make money online as a student using only a phone isn’t just a keyword—it’s a lifeline. And it’s real.

You don’t need to have it all figured out.
You don’t need fancy tools.
You just need to start—imperfectly, patiently, honestly.

Your phone isn’t a distraction.
In the right hands, it’s a doorway.

And you’re already holding the key.

Posted on Leave a comment

Student Proofreading Side Hustle for Beginners: How I Built Mine From Zero

Student proofreading side hustle for beginners is one of the fastest, safest ways to earn flexible income without sacrificing your studies — and it’s exactly how I went from stressed and broke to financially steady as a student. If you can read carefully and spot mistakes, you already have what it takes to start proofreading online and getting paid. I didn’t have experience, connections, or money to invest — just desperation, curiosity, and a laptop.
This article is the honest, step-by-step story of how I went from broke and overwhelmed to earning consistent money proofreading — without fancy degrees, contacts, or luck.

What follows isn’t theory. It’s a lived experience.

Student Proofreading Side Hustle for Beginners: How I Built Mine From Zero

What Is a Student Proofreading Side Hustle for Beginners (And Why It Works So Well)

I still remember the night clearly. It was 2:17 a.m., my desk lamp flickering, instant noodles cooling beside my laptop. I was staring at my bank balance — and it was terrifyingly low.

I was a student with:

  • Tuition bills piling up
  • A part-time job that barely covered groceries
  • Zero energy for another shift

I didn’t want to drop out. I didn’t want to borrow more money.
I needed a student-friendly side hustle that didn’t eat my study time.

That night, while scrolling aimlessly, I stumbled on a comment from someone saying,

“I proofread essays for students online. It pays better than my café job.”

That single sentence planted a seed.

What Is a Student Proofreading Side Hustle (Really)?

At its core, a student proofreading side hustle means getting paid to:

  • Fix grammar and spelling
  • Improve clarity and flow
  • Catch small mistakes others miss

You’re not rewriting papers.
You’re not doing academic dishonesty.
You’re simply helping writing shine.

Why It Works Perfectly for Beginners

  • No upfront investment
  • Flexible hours
  • Skills you already use daily
  • Works globally

If you can read carefully and spot mistakes, you’re already halfway there.

Why Proofreading Was the Perfect Hustle for My Student Life

I tried other side hustles first. Surveys. Dropshipping. Even tutoring.
Nothing stuck.

Proofreading did — because it fit my reality.

Here’s what made it different:

  • I controlled my hours (late nights, weekends, exam weeks)
  • No awkward sales calls
  • Quiet, focused work
  • Remote-friendly from anywhere

Most importantly, it didn’t drain me emotionally.
It felt calm. Intentional. Almost meditative.

That mattered more than money at first.

How I Started With Zero Experience (No Courses, No Contacts)

Let me be clear:
I had no proofreading certification when I started.

What I did have:

  • Strong English skills
  • Obsessive attention to detail
  • A willingness to learn fast

Step 1: I Practiced on Real Text

I proofread:

  • Old essays
  • Blog posts
  • Public articles

I learned how grammar feels, not just rules.

I also checked my work against basic proofreading tools like Grammarly to understand common grammar patterns and mistakes without relying on it blindly.

Step 2: I Picked One Platform

I started on freelance marketplaces because:

  • No pitching required
  • Built-in clients
  • Beginner-friendly

I created a simple profile:

“Student proofreader helping writers polish grammar, clarity, and tone.”

That was it.

My First Client (And Why I Undercharged on Purpose)

My first client paid me $8.

Was it low? Yes.
Was it worth it? Absolutely.

Because:

  • I gained confidence
  • I got a real testimonial
  • I proved this was possible

I treated that job like gold.
I overdelivered. I communicated clearly. I met deadlines early.

That client came back — and referred a friend.

How Much Can a Student Proofreading Side Hustle Actually Pay?

This question matters — so here’s the honest answer.

Even major career platforms now recognize proofreading as a legitimate side job, especially for students and remote workers.

Beginner Earnings (First 1–2 Months)

  • $10–$20 per hour
  • Small jobs (500–1,000 words)

Intermediate Level

  • $25–$40 per hour
  • Academic papers, blog posts

Advanced / Niche Proofreaders

  • $50+ per hour
  • Theses, books, business content

I now earn more proofreading part-time than I did working retail full-time.

Not overnight.
But steadily.

The Skills That Matter More Than Perfect Grammar

Surprise: grammar rules aren’t everything.

What really matters:

  • Patience
  • Focus
  • Clear communication
  • Respect for deadlines

Clients care more about:

  • Reliability
  • Consistency
  • Trust

I once landed a long-term client simply because I replied within 10 minutes.

When I felt unsure about a rule, I double-checked explanations from trusted academic resources like the Purdue Online Writing Lab instead of guessing.

Common Mistakes Beginners Make (That I Made Too)

Let me save you time.

❌ Trying to Sound Too Professional

Clients want clarity, not jargon.

❌ Taking Every Job

Burnout is real. Choose wisely.

❌ Fear of Raising Rates

If you don’t value your time, no one will.

❌ Ignoring Feedback

Feedback is gold. Use it.

Each mistake taught me something — but you don’t need to repeat them.

How I Balanced Proofreading With Exams and Life

This part mattered most.

I set non-negotiable rules:

  • No jobs during finals week
  • Max 2 clients at once
  • Fixed proofreading blocks

Proofreading worked because I respected my limits.

Your side hustle should support your life — not replace it.

Who This Side Hustle Is (And Isn’t) For

This is perfect if you:

  • Enjoy reading
  • Notice small details
  • Want quiet, flexible income
  • Prefer solo work

It’s not ideal if you:

  • Hate reading
  • Rush through tasks
  • Avoid feedback
  • Want instant big money

Honesty matters here.

The Emotional Shift I Didn’t Expect

Something unexpected happened.

I stopped panicking about money.

I stopped saying yes to shifts I hated.
I started planning — instead of surviving.

Proofreading gave me:

  • Confidence
  • Independence
  • Control

That emotional freedom?
Priceless.

Frequently Asked Questions (FAQs)

1. Can beginners really start a student proofreading side hustle?

Yes. Most clients care about clarity, reliability, and effort — not certificates.

2. Do I need perfect English?

No. You need strong English and a willingness to improve.

3. Is proofreading ethical for students?

Yes. Proofreading improves quality without altering ideas.

4. How long before I earn real money?

Many beginners earn within 1–2 weeks of starting.

5. Can this become long-term income?

Absolutely. Many turn it into freelance careers.

Final Thoughts: If I Could Start Again, I’d Do This Faster

If you’re reading this while stressed about money, tired of low-pay jobs, or worried about balancing studies and income — I get it.

I was you.

A student proofreading side hustle for beginners isn’t glamorous.
But it’s real. Reliable. Sustainable.

You don’t need permission.
You don’t need perfection.

You just need to start.

And if you do — this could be the decision you thank yourself for years from now.

Posted on Leave a comment

How to Earn Money After School Without Leaving Home: My Real Journey From Broke to Confident

How to Earn Money After School Without Leaving Home: My Real Journey From Broke to Confident

How to earn money after school without leaving home was the question I searched one exhausted afternoon when school ended, bills felt heavy in the house, and I realized I needed income—but couldn’t step outside for a job.

I didn’t want fast cash — I wanted to learn basic financial independence skills that would actually help me long term.

The answer, surprisingly, was simpler than I expected: by using basic skills, online tools, and one focused hour a day, I found real ways to earn from home after school. This article shares exactly how I struggled, what actually worked, and how you can start earning without commuting, experience, or burnout.

That’s the solution.
The rest of this article is how I learned it the hard way—and how you can skip the painful parts.

How to Earn Money After School Without Leaving Home (What Actually Works)

I remember that afternoon vividly.

School bag dumped by the door. Phone buzzing with group chats. My parents are arguing quietly about bills in the kitchen. And me—lying on my bed, staring at the ceiling, feeling useless.

I wanted money. Not luxury money. Just freedom money. Enough to stop asking. Enough to help. Enough to feel capable.

The problem?
I couldn’t leave home.

  • Too young for a “real” job
  • No car
  • Homework, exams, family responsibilities
  • Zero connections

So I typed into Google—half embarrassed, half desperate:

“how to earn money after school without leaving home”

What I found was overwhelming. Surveys. Scams. Influencers screaming about six figures. None of it felt real.

But buried under the noise was something important: ordinary people quietly earning ordinary money—consistently—online.

That’s where my journey started.

Why Earning Money After School From Home Feels So Hard (But Isn’t)

The Emotional Barrier Nobody Talks About

The hardest part wasn’t learning skills.

It was believing I deserved to earn.

When you’re young, people subtly tell you:

  • “Focus on school”
  • “Money will come later”
  • “You don’t know enough yet”

But here’s what I learned:

👉 Earning money after school isn’t about being an expert. It’s about being useful.

Once I understood that, everything shifted.

What Actually Works: Real Ways to Earn Money After School at Home

This isn’t a list of “get rich quick” ideas.
These are real methods I’ve tried, failed at, refined, or watched friends succeed with.

1. Freelancing With Skills You Already Use Daily

I didn’t realize this at first, but the things I did for fun were valuable.

What worked for me:

  • Writing simple posts
  • Editing documents
  • Basic Canva designs
  • Organizing Google Docs

I started offering small services:

  • $5 here
  • $10 there

It felt tiny. But it wasn’t.

💡 Lesson learned: Small money builds big confidence.

How you can start today:

  • Write down 5 things you’re already good at
  • Offer them simply (no fancy branding)
  • Start cheap, improve fast

I later realized many of the skills I used casually were the same ones taught on online skill-building platforms — just packaged more formally.

2. Online Tutoring: Teaching What You Just Learned

This one surprised me.

I assumed tutors had to be perfect students. Wrong.

People don’t need perfection—they need clarity.

I helped younger students with:

  • Homework organization
  • Exam prep
  • Basic concepts

Even explaining something you just learned can be powerful.

Why this works after school:

  • Flexible hours
  • No commuting
  • Builds communication skills

💬 Teaching reinforced my confidence more than money ever could.

3. Content Creation Without Being “Famous”

I hate being on camera.

So when people said, “Just start YouTube or TikTok,” I almost quit the idea entirely.

But here’s the truth nobody tells you:

👉 You don’t need to be famous to earn. You need to be consistent.

I started:

  • Writing short blog posts
  • Posting study tips
  • Sharing honest experiences

Money came slowly—but it came.

Key takeaway:
Content isn’t about going viral. It’s about helping one person repeatedly.

Most of what I learned came from experimenting and using free online learning resources rather than paid courses.

How I Balanced School, Work, and Burnout

This part matters.

I burned out once. Hard.

What went wrong:

  • Saying yes to everything
  • Working late nights
  • Chasing fast money

What fixed it:

  • Time blocking (1–2 hours max)
  • Clear boundaries
  • Choosing one income stream at a time

🧠 Mental health is part of the income equation.

If earning money after school destroys your energy, you’re doing it wrong.

The Mistakes I Made So You Don’t Have To

❌ Mistake 1: Chasing “Easy Money”

If it sounds too easy, it usually is.

❌ Mistake 2: Comparing My Progress

Someone will always be earning more. Focus on your lane.

❌ Mistake 3: Quitting Too Early

Most things started working only after I wanted to quit.

📌 Rule I live by now:
Give any method 30 honest days before judging it.

How Much Money Can You Realistically Earn After School From Home?

Let’s be honest.

This isn’t about overnight wealth.

Realistic ranges (from experience):

  • Beginner: $50–$200/month
  • Consistent effort: $300–$800/month
  • Advanced skills: $1,000+/month

That first $50 changed my mindset forever.

Because it proved something powerful:

👉 I could earn. On my own terms.

Skills I Accidentally Built Along the Way

The money mattered—but the skills mattered more.

I learned:

  • Communication
  • Self-discipline
  • Time management
  • Confidence
  • Digital literacy

These skills followed me into:

  • Better opportunities
  • Better interviews
  • Better self-belief

💭 Earning after school didn’t distract me from my future—it prepared me for it.

How to Start Today (Without Overthinking It)

Here’s the simplest starting plan I wish I had:

Step 1: Choose ONE method

Not five. One.

Step 2: Commit 1 hour a day

Consistency beats intensity.

Step 3: Expect awkwardness

It’s part of growth.

Step 4: Track progress, not perfection

Momentum matters more than talent.

Why Learning How to Earn Early Changes Everything

Money isn’t just money.

It’s:

  • Confidence
  • Choice
  • Self-trust

When you learn how to earn money after school without leaving home, you’re not just making cash—you’re learning independence.

And that stays with you forever.

Frequently Asked Questions (FAQs)

1. Is it really possible to earn money after school without leaving home?

Yes. With internet access, basic skills, and consistency, many students earn from home through freelancing, tutoring, content creation, and digital services.

2. How much time do I need each day?

Even 30–60 minutes daily can lead to results if used consistently and focused on one skill or method.

3. Do I need money to start?

No. Most methods require only a device, internet connection, and willingness to learn.

4. What if I’m not “good” at anything yet?

Skills are built, not discovered. Start small, learn as you go, and improve through practice.

5. Is this safe and legal for students?

Yes, as long as you choose legitimate platforms, avoid scams, and follow local age-related regulations.

Final Thoughts: The Quiet Power of Starting Small

I didn’t become rich.
I didn’t go viral.
I didn’t “escape the system.”

What I did was far more important.

I proved to myself that I could start from nothing—and build something.

If you’re reading this after school, tired, uncertain, and hopeful in a quiet way…
I see you.

Start small. Stay honest. Keep going.

Because learning how to earn money after school without leaving home isn’t just about income.

It’s about becoming someone who believes in their own ability to create a future.

And that belief? That’s priceless.

Posted on Leave a comment

Easy Side Hustles for Teens With No Experience (A Real-Life Journey)

Easy Side Hustles for Teens With No Experience (A Real-Life Journey)

Easy side hustles for teens with no experience changed my life long before I realized what was happening.

If you want the fast answer: yes, you can start making money as a teen with zero skills, zero connections, and almost zero confidence—as long as you start small, stay consistent, and stop waiting to feel “ready.”

I didn’t grow up entrepreneurial. I grew up Googling “how to make money as a teen” at midnight, hoping no one would notice how badly I wanted independence. What follows isn’t a list scraped from the internet. It’s my story—what worked, what failed, and what finally clicked.

Why Easy Side Hustles for Teens With No Experience Matter More Than Ever

I still remember the exact moment it hit me.

I was standing in a grocery store aisle, counting coins to see if I could afford snacks for the week. I wasn’t broke-broke—but I was stuck. Too young for most jobs. Too inexperienced for anything “serious.” And tired of asking my parents for money.

That frustration? That’s where side hustles are born.

Many of the legal work options for teens are designed to encourage independence while still protecting education and safety.

What I Learned the Hard Way

  • You don’t need talent—you need movement
  • Experience is something you build, not something you wait for
  • Small income builds big confidence

Side hustles aren’t just about money. They’re about learning how value works in the real world.

What Counts as an “Easy” Side Hustle for Teens?

When I say easy, I don’t mean lazy.
I mean low barrier, low risk, and learnable fast.

An Easy Side Hustle Has These Traits

  • No upfront investment (or under $20)
  • No prior experience required
  • Can start within 7 days
  • Uses skills you already have (or can learn quickly)
  • Flexible around school and life

If a hustle requires certifications, expensive tools, or years of practice—it’s not easy. Period.

The First Side Hustle I Tried (And Why It Failed)

My first attempt was online surveys.

I stayed up late clicking through endless questions… for $3.17.

I wasn’t lazy—I was misinformed.

The Lesson

If your effort doesn’t build a skill, a reputation, or a relationship, it won’t scale.

That failure taught me something important:

Easy side hustles for teens with no experience should grow with you—not trap you.

Easy Side Hustles for Teens With No Experience That Actually Work

Below are hustles I’ve personally tried, helped others start, or watched teens grow into real income streams.

1. Local Service Hustles (The Fastest Way to Cash)

This is where my confidence exploded.

Examples That Work Anywhere

  • Dog walking
  • Lawn mowing
  • Snow shoveling
  • Car washing
  • Babysitting
  • House cleaning

My Breakthrough Moment

I printed a simple flyer:

“Responsible teen offering lawn care & yard help.”

One house said yes.
That turned into three.
Then weekly income.

Why This Works

  • People value reliability, not resumes
  • Local trust beats online competition
  • You learn customer communication fast

How to Start

  1. Pick one service
  2. Set a simple price
  3. Ask neighbors, family friends, or community boards
  4. Show up on time—every time

2. Online Freelancing (Even With Zero Skills)

I thought freelancing was only for “talented” people.

I was wrong.

Beginner-Friendly Freelance Gigs

  • Data entry
  • Virtual assistance
  • Simple Canva designs
  • Writing captions
  • Transcription
  • Editing AI-generated text

Many teens get their first clients through beginner-friendly freelancing platforms, where reliability often matters more than a perfect resume.

The Mindset Shift

You’re not selling expertise—you’re selling time + effort + learning speed.

How Teens Get Hired Without Experience

  • Be honest: “I’m learning, but reliable”
  • Start with small tasks
  • Overdeliver once
  • Ask for a testimonial

That first testimonial? Gold.

3. Selling Digital Products (Quietly Powerful)

This one surprised me.

I created a simple study planner for myself. A friend asked for it. Then another.

That’s when it clicked.

Beginner Digital Products Teens Can Sell

  • Study planners
  • Homework trackers
  • Notion templates
  • Instagram caption packs
  • Simple ebooks (guides, checklists)

Why This Is a Game-Changer

  • Create once, sell many times
  • No inventory
  • Builds real skills

Even one sale a day teaches more than any lecture.

This form of selling digital products works because once something is created, it can help others repeatedly without extra effort.

4. Content Creation (Before You Think You’re “Good”)

I hesitated here for years.

“What if people judge me?”
They didn’t.

Platforms Teens Are Winning On

  • TikTok
  • YouTube Shorts
  • Instagram Reels
  • Blogs

You Don’t Need to Be an Expert

Document, don’t teach.

Learning simple content creation basics helps teens grow safely while understanding platform rules and audience responsibility.

Share:

  • Your learning journey
  • Mistakes
  • Progress
  • Experiments

The irony? Authentic beginners grow faster than polished “experts.”

5. Reselling (Flipping With Zero Experience)

This hustle taught me value faster than anything else.

What Teens Can Resell

  • Thrift store clothes
  • Old books
  • Sneakers
  • Electronics
  • Toys
  • Games

My First Flip

Bought a jacket for $6.
Sold it for $25.

Profit wasn’t just money—it was proof.

Skills You Build

  • Pricing
  • Negotiation
  • Market research
  • Customer communication

These skills last forever.

6. Tutoring & Homework Help (Even If You’re Not “Top of the Class”)

If you’re one chapter ahead—you can help someone else.

What Works

  • Math basics
  • Language help
  • Test prep
  • Study accountability sessions

Confidence grows when you realize:

Teaching reinforces learning.

7. Simple Tech Help for Adults

This one is underrated.

Examples

  • Setting up phones
  • Organizing files
  • Installing apps
  • Teaching social media basics

Adults don’t expect perfection. They want patience.

8. Micro-Entrepreneurship Projects

Think small. Very small.

Examples

  • Custom stickers
  • Handmade bracelets
  • Print-on-demand designs
  • Seasonal items

Start ugly. Improve fast.

Why Most Teens Quit (And How Not To)

I almost quit too.

The Real Reasons

  • Results aren’t instant
  • Comparison kills motivation
  • Fear of looking “bad”

The Fix

  • Track effort, not outcome
  • Commit to 30 days
  • Celebrate tiny wins

Momentum beats motivation every time.

How Easy Side Hustles for Teens With No Experience Build Real Confidence

Money is a side effect.

The real reward?

  • Self-trust
  • Problem-solving
  • Independence
  • Identity

You stop asking, “Can I?”
You start saying, “I’ll figure it out.”

FAQs: Easy Side Hustles for Teens With No Experience

1. Can teens really make money without experience?

Yes. Experience is built through action. Most clients value reliability more than skill.

2. How much money can a teen realistically make?

Anywhere from $50 to $500+ per month starting out, depending on effort and consistency.

3. Are side hustles safe for teens?

Yes, when you avoid scams, involve parents when needed, and stick to trusted platforms or local services.

4. Do side hustles hurt school performance?

Not if managed well. Many teens report improved discipline and time management.

5. What’s the best first side hustle to try?

Local services. They’re fast, simple, and confidence-boosting.

Final Thoughts: Your Starting Point Is Enough

If I could talk to my younger self, I’d say this:

You don’t need permission.
You don’t need talent.
You don’t need experience.

You just need to start.

Easy side hustles for teens with no experience aren’t about money—they’re about becoming someone who believes in themselves.

Start small. Stay curious. Keep going.

Your future self is already grateful you did.

Posted on Leave a comment

Zero Based Budgeting for Teenagers Explained Simply: A Real-Life Money Reset Story

Zero Based Budgeting for Teenagers Explained Simply: A Real-Life Money Reset Story

Zero Based Budgeting for Teenagers Explained Simply means deciding where every single dollar goes before you spend it — so money stops disappearing and starts working for you. This simple system helped me go from constantly feeling broke to feeling confident, calm, and in control of my money. I didn’t earn more, I just learned how to give my money purpose — and that changed everything.

If you want a formal definition, zero-based budgeting is explained clearly here on Investopedia

I wasn’t bad with money because I was irresponsible. I was bad with money because no one ever taught me how it actually works. What follows isn’t a textbook explanation. It’s my real story — mistakes, frustration, breakthroughs — and a simple system that finally made money feel clear, calm, and empowering.

Zero Based Budgeting for Teenagers Explained Simply: Why It Finally Made Sense to Me

I still remember opening my banking app at 17 and feeling that familiar pit in my stomach.

I had a part-time job. I didn’t have rent. I didn’t have bills.

So why was my balance always close to zero?

Every paycheck followed the same pattern:

  • First few days: freedom
  • Next week: confusion
  • End of the month: panic

Money wasn’t gone — it had just leaked away quietly. Snacks after school. A game download. Random online purchases. None of it felt big enough to worry about… until it all added up.

The emotional part surprised me most. I didn’t feel lazy or careless. I felt out of control. And that feeling followed me everywhere.

That’s when I learned the most important lesson of all:

Money problems are rarely about math. They’re about clarity.

What Is Zero Based Budgeting (In Teen Language)?

Let’s strip away the intimidating finance words.

Zero-based budgeting simply means this:

You decide where every dollar goes before you spend it — until your balance hits zero.

Important clarification:
“Zero” doesn’t mean you spend everything.
It means every dollar is assigned a purpose.

Some dollars go to:

  • Spending
  • Saving
  • Giving
  • Future goals

When the money arrives, you tell it where to go. Not the other way around.

For the first time, I wasn’t reacting to money.
I was directing it.

The Moment It Finally Clicked for Me

The breakthrough didn’t happen in a classroom. It happened at my desk, late at night, with a cheap notebook and a pen.

I wrote down:

  • My monthly income
  • Every place my money could go

Then I did something radical for a teenager:

I planned my spending before I had the money.

That single moment changed everything.

Suddenly:

  • I stopped feeling guilty when I spent
  • I stopped feeling anxious checking my balance
  • I stopped guessing and started choosing

Zero-based budgeting gave me something I’d never had before — permission with boundaries.

How Zero Based Budgeting Actually Works (Step by Step)

Step 1: Know Exactly How Much Money You Have

This includes:

  • Allowance
  • Part-time job income
  • Gift money (if regular)

Use the lowest predictable number. Overestimating is how budgets fail.

Step 2: List Your Real-Life Categories

Forget complicated charts. Mine looked like:

  • Snacks & food
  • Entertainment
  • Transport
  • Saving
  • Fun money
  • Gifts

The rule: If you spend it, it gets a category.

Step 3: Assign Every Dollar a Job

If you earn $200:

  • $60 snacks
  • $40 entertainment
  • $50 savings
  • $30 transport
  • $20 fun buffer

$200 – $200 = zero

No unassigned money = no mystery stress.

This idea of assigning every dollar a purpose is also echoed in basic budgeting guidance from MoneyHelper’s official budgeting advice in the UK

Step 4: Track Gently, Not Obsessively

I didn’t log every cent. I checked weekly.

Progress beats perfection every time.

Why This Method Works So Well for Teenagers

Teen life is unpredictable. Schedules change. Friends invite you out at the last minute. Impulse buys happen.

Zero-based budgeting works because it’s flexible but intentional.

You’re not saying “I can’t spend.” You’re saying, “I already decided.”

That mindset shift is everything.

Even government education programs now emphasize early money habits — the Consumer Financial Protection Bureau’s teen money resources reinforce why learning budgeting young builds lifelong confidence

How Zero Based Budgeting Helped My Confidence (Not Just My Wallet)

Here’s something no one talks about:

Money clarity builds self-trust.

When I followed my budget:

  • I felt mature
  • I felt capable
  • I felt proud

I stopped hiding purchases. I stopped avoiding my balance. I stopped feeling behind.

Confidence doesn’t come from having more money. It comes from knowing what you’re doing with what you have.

Common Mistakes Teens Make (I Made Them All)

1. Being Too Strict

If you don’t allow fun money, the budget collapses. Fun isn’t the enemy. Guilt is.

2. Forgetting Irregular Expenses

Birthdays. School events. Random costs. Build a “future stuff” category.

3. Giving Up After One Bad Week

One mistake doesn’t mean failure. It means learning.

Budgeting is a skill — not a personality trait.

Australian youth finance programs agree that mistakes are part of learning — ASIC MoneySmart’s budgeting guides emphasize adjusting instead of quitting

How Parents Can Support Without Controlling

If you’re a parent reading this, here’s the truth:

Control creates rebellion. Guidance builds confidence.

What helped me most wasn’t rules. It was a conversation.

Helpful support looks like:

  • Asking questions, not giving lectures
  • Letting teens make small mistakes
  • Celebrating effort, not perfection

Money habits stick when teens feel respected.

Real-Life Example: My First Savings Win

Three months into zero-based budgeting, something wild happened.

I had money left over.

Not accidentally. On purpose.

I saved for something specific — no borrowing, no stress.

That moment taught me:

Planning feels better than impulse, every time.

Why Schools Don’t Teach This (And Why That’s Okay)

Most schools teach math. Few teach money behavior.

That gap isn’t your fault.

The good news? You don’t need a class. You need a system — and practice.

Zero-based budgeting is simple enough to learn young and powerful enough to last a lifetime.

How to Start Today (Even If You’re Overwhelmed)

Start messy. Start small. Start honest.

All you need:

  • One page
  • One income number
  • A few categories

You don’t need perfection. You need clarity.

Frequently Asked Questions (FAQs)

1. Is zero based budgeting too complicated for teenagers?

No. It’s actually simpler than traditional budgeting because it removes guesswork.

2. Do I need an app to use zero based budgeting?

No. Paper works. Notes apps work. Apps are optional — clarity is not.

3. What if my income changes every month?

Budget based on the minimum you expect. Adjust when extra comes in.

4. Can zero based budgeting help with saving?

Yes — saving becomes intentional, not accidental.

5. How long does it take to see results?

Most teens feel calmer within the first month. Confidence builds fast.

Read Also: From Broke to Building My Dreams: 15 Pocket Money Hacks Every Student Must Know

Final Thoughts: Why I Wish I’d Learned This Earlier

If I could go back and tell my teenage self one thing, it would be this:

Money isn’t scary when you give it direction.

Zero Based Budgeting for Teenagers Explained Simply isn’t just about dollars. It’s about freedom. Confidence. Choice.

And the best part?

You don’t need more money. You just need a plan.

If you’re a teenager reading this — or a parent guiding one — start today. One page. One decision. One step toward a calmer financial future.

You’ve got this.

Posted on Leave a comment

How to Budget Your First Paycheck at 18 (A Real-Life Beginner Guide)

How to Budget Your First Paycheck at 18

How to budget your first paycheck at 18 comes down to one simple truth: decide where your money goes before it disappears. When I got my first paycheck at 18, I thought having money meant freedom — until it was gone in days and I felt stressed, embarrassed, and completely unprepared. This guide isn’t theory or finance jargon. It’s the exact process I learned the hard way, step by step, to take control of my money early and avoid the mistakes most people don’t fix until their 30s.

I didn’t budget my first paycheck at 18. I spent it. Fast. And then I wondered why I was stressed, broke, and embarrassed two weeks later. What follows is the real, human process I went through to finally learn how to budget my first paycheck at 18 — not perfectly, but well enough to change my life.

When I finally accepted that I needed help, I started looking into basic budgeting skills for beginners and realized how little I had actually been taught about money growing up. Budgeting wasn’t something I failed at — it was something I was never shown how to do properly.

How to Budget Your First Paycheck at 18 When You’ve Never Managed Money Before

I still remember the sound of the ATM receipt printing. That thin paper felt like proof I was finally an adult. I was 18, freshly employed, and convinced that money problems were something older people dealt with.

That first paycheck felt huge. Not because it was huge — it wasn’t — but because it was mine. I earned it. Every shift, every annoying customer, every late night.

Here’s what no one told me:
Your first paycheck isn’t just money. It’s a test.

A test of impulse.
A test of priorities.
A test of whether in the future-you gets a voice… or gets ignored.

I failed that test spectacularly.

What surprised me most was learning that my mistakes weren’t unique. So many young people struggle because they’ve never been exposed to real money management tips for teenagers, especially when school focuses more on exams than everyday life skills.

Why Budgeting at 18 Feels Awkward (and Why That’s Normal)

Let’s be honest. When you’re 18, budgeting feels weird.

You don’t have a mortgage.
You’re not thinking about retirement.
You just want to enjoy finally having cash.

I remember thinking, “I’ll budget later. Right now, I deserve this.”

And yes — you do deserve to enjoy your money. But here’s what I learned the hard way:

Budgeting isn’t about restriction. It’s about permission.

A budget doesn’t say “you can’t.”
It says, “you can — without guilt or fear.”

Once I understood that, everything shifted.

How I Blew My First Paycheck (So You Don’t Have To)

I wish I could tell you I spent my first paycheck wisely. I didn’t.

I bought clothes I didn’t need.
I ate out constantly.
I said yes to everything because I finally could.

Two weeks later, I had:

  • No savings
  • No emergency cushion
  • A mild panic attack when my card declined

That moment — standing in line, pretending I wasn’t embarrassed — was my wake-up call.

Money disappears faster when it has no plan.

That was the moment I decided I needed to learn how to budget my first paycheck at 18 — properly this time.

How to Budget Your First Paycheck at 18 (The Simple System That Saved Me)

Step 1: Start With One Honest Question

Before spreadsheets. Before apps. Before rules.

Ask yourself:
“What do I want my money to do for me?”

At 18, my answer was simple:

  • I wanted less stress
  • I wanted some freedom
  • I wanted to stop feeling broke all the time

That clarity matters more than any budgeting method.

Step 2: Pay Yourself First (Even If It’s Tiny)

This was the hardest lesson — and the most powerful.

The first time I tried saving, I waited until the end of the month. There was nothing left.

So I flipped it:

  • The moment I got paid
  • I moved 10% into savings
  • No debate. No excuses.

Sometimes it was $20. Sometimes $40.

It didn’t matter.

What mattered was the habit.

Saving first taught me that future-me mattered just as much as present-me.

I still remember staring at my pay stub and wondering why my first paycheck looked smaller than expected. Nobody explained taxes, deductions, or why my “hourly rate” didn’t match what landed in my account.

Step 3: Use the “Four Buckets” Method (No Math Degree Required)

This is the method that finally stuck for me.

I split my paycheck into four simple buckets:

1. Needs

  • Phone bill
  • Transport
  • Basic food
  • Anything required to live/work

2. Fun

  • Eating out
  • Entertainment
  • Clothes
  • Random joys

3. Savings

  • Emergency fund
  • Short-term goals
  • Long-term peace of mind

4. Giving / Flex

  • Gifts
  • Helping family
  • Unexpected stuff

No complex percentages.
No guilt.

Just awareness.

The first real test of my budget came when something unexpected happened. That’s when I truly understood the importance of building an emergency fund early — not as a financial rule, but as emotional protection against panic and debt.

What Budgeting at 18 Taught Me About Self-Respect

This part surprised me.

Once I started budgeting, something strange happened:
I felt… calmer.

Not richer.
Not perfect.

Just calmer.

Budgeting taught me:

  • To pause before spending
  • To think before reacting
  • To respect my own effort

Every dollar represented an hour of my life.

That realization changed everything.

How Much Should You Save From Your First Paycheck at 18?

This is one of the most searched questions — and here’s the honest answer:

Save what you can without quitting.

For me:

  • Some weeks it was 5%
  • Some weeks it was 15%

The goal wasn’t perfection.
The goal was consistency.

If saving feels painful, you won’t stick with it.
If it feels doable, you’ll build momentum.

Once I understood why saving early matters, even small amounts felt powerful. Saving $20 didn’t seem pointless anymore — it felt like proof that I was finally thinking ahead instead of just surviving payday to payday.

Budgeting Mistakes I Still See 18-Year-Olds Making

I mentor younger coworkers now, and I see the same mistakes I made.

Mistake 1: Waiting to “make more money”

You don’t need more money.
You need more clarity.

Mistake 2: Copying someone else’s budget

Your life isn’t their life.
Your budget should fit you.

Mistake 3: Being too strict

Budgets that don’t allow fun don’t survive.

How to Budget Your First Paycheck at 18 Without Feeling Miserable

Here’s the secret no one says out loud:

If your budget feels like punishment, it’s broken.

Your budget should:

  • Let you enjoy your money
  • Reduce stress
  • Give you confidence

Mine finally worked when I:

  • Scheduled fun spending
  • Forgave small mistakes
  • Focused on progress, not perfection

The Moment I Realized Budgeting Was Changing My Life

About six months in, my phone broke.

Old me would’ve panicked.
New me opened my savings and paid for it.

No stress.
No borrowing.
No shame.

That was the moment I realized budgeting wasn’t about money.

It was about freedom.

How Budgeting Early Gave Me a Head Start Most People Never Get

Starting at 18 gave me something priceless: time.

Time to:

  • Learn without huge consequences
  • Build habits slowly
  • Make mistakes cheaply

Most people don’t learn this until debt forces them to.

You don’t need to be perfect.
You just need to start early.

How to Budget Your First Paycheck at 18 Using Just Your Phone

If you’re wondering how to actually track things, here’s what worked for me:

  • One notes app
  • One weekly check-in
  • One simple list:
    • Money in
    • Money out
    • What’s left

That’s it.

You don’t need fancy tools.
You need honesty and consistency.

Frequently Asked Questions (FAQs)

1. How should an 18-year-old budget their first paycheck?

Start simple. Save a small portion first, cover essentials, allow guilt-free fun, and track everything weekly.

2. Is it really necessary to budget at 18?

Yes — not because you have big bills, but because habits form fast. Early budgeting builds lifelong confidence.

3. How much money should I save from my first job?

Aim for 5–20%. Any amount saved consistently matters more than the number.

4. What’s the easiest budgeting method for beginners?

The four-bucket method (Needs, Fun, Savings, Flex) is simple and flexible.

5. What if I mess up my budget?

You will. Everyone does. Adjust, forgive yourself, and keep going.

Read Also : How to Save Money As a Teenager With No Job

Final Thoughts: Your First Paycheck Is Bigger Than Money

Learning how to budget your first paycheck at 18 isn’t about becoming boring or restrictive.

It’s about:

  • Respecting your effort
  • Protecting your future
  • Giving yourself options

I didn’t get it right the first time.
Or the second.

But I started — and that changed everything.

If you’re holding your first paycheck right now, remember this:

You’re not just earning money. You’re learning how to handle freedom.And that skill?
It’s worth more than the paycheck itself.